Record Crate
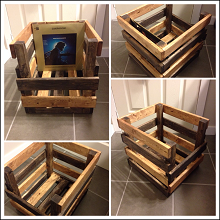

I did this as a gift for a friend of mine who is a big
record collector. I am also a music
collector and this crate inspired an idea I have for a record cabinet. But that will be a later post. If you have someone who is a big collector
this is a cool looking gift that is very useful. It's also a great starter project for someone
who is just getting into making things and doing projects such as this.
I've also had a number of people ask me if this was made with reclaimed wood. it was not, but could be. However the stain does give it that look.
What you will need:
I've also had a number of people ask me if this was made with reclaimed wood. it was not, but could be. However the stain does give it that look.
What you will need:
|
Wood
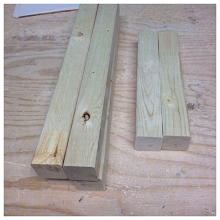
3 - 1x3" X 8 feet long 1 - 1x2" X 8 feet long Cut List 1x3 - (11 X 15") -Sides of crate (4 each side) and base (3) 1x3 - (6 x 14") - Ends of crate 2x2 - (2 x 9 1/2") - Ends for frame 2x2 - (4 x 15") - Frame posts |
Other Materials/Tools
One Box (100) Wood Screws - 1 1/2" 8 x 2 1/2" Wood Screws (for 2x2 framing) Saw - (any kind of saw will do) Sander - (Hand sanding is possible but a lot of work. Take $40 and invest in a little electric sander) Drill 80 Grit and 220 Grit sandpaper Wood Putty Wood Sealer Stain - you'll need two different kinds of stain if you want to do it the same as I did. I used Varathane brand Dark Walnut and Espresso on this. However you can of course do it in one colour. Paint sponge - to apply stain |
Lets head into my Laundry Room work shop. Which is getting very messy with the number
of things I'm working on.
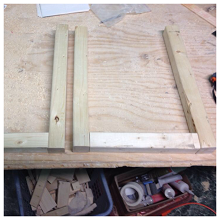
Once you've cut all your pieces, assemble the end framing as
shown. I decided against building this
frame like a box as it was unnecessary extra material and weight. Plus there will be lots of pieces to hold it
together. This is where you'll use your
2 1/2" screws to connect the 2x2's.
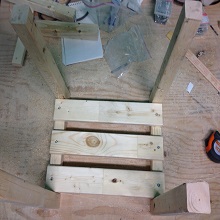
Now use three of your 15" 1x3's to build the base of
the crate. It's best to space out and
connect one end first. This is
relatively straight forward, place the 1x3's against the 2x2 framing then place
the third piece in the centre.
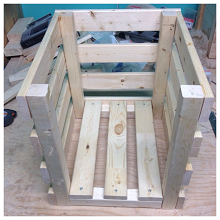
Now attach your remaining side pieces. Leave your two front pieces to the last. Attach your bottom row first (starting with
one of the sides, then the end piece, then the other side). Next attach your top row in the same order. Once these are attached, evenly space out your
other two rows and attach. You also might want to place a record inside the crate to make sure everything fits.
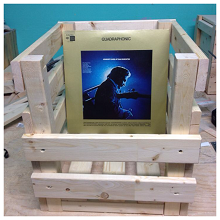
For style I off set the front two pieces. you can do as you wish with these. It's just important to leave space at the
front to access the records (it's easier to flip through them that way).
Wood putty your screw holes and get ready to sand. There's a lot of different surfaces on this crate, which makes it a little difficult to sand everywhere. Do your best. Start with the 80 grit then finish with the 220. Apply your wood sealer, let dry (no more than 1 hour usually) and then you are ready to stain.
Wood putty your screw holes and get ready to sand. There's a lot of different surfaces on this crate, which makes it a little difficult to sand everywhere. Do your best. Start with the 80 grit then finish with the 220. Apply your wood sealer, let dry (no more than 1 hour usually) and then you are ready to stain.
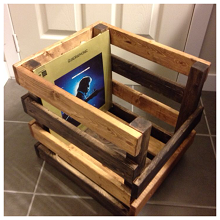
If you decide to do the two colour style like I did a handy
tip is to stain the pieces you want darker first. Again, like the sanding, staining is a little
difficult as there are a number of different surfaces. But remember, this is
suppose to look a little rough, so if it's not perfect that's alright. The best advice I can give is have patience
and have fun. Once your stain is dry,
fill with records and enjoy.