DIY Yarn box/knitting box


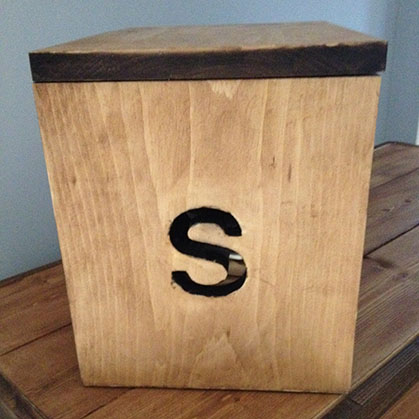
This project was a Christmas gift for my mother. She does a lot of knitting and yarn work (every fall she makes a number of baby toques and booties to donate to the hospital for premature babies). I noticed that she had balls of yarn laying all over the place when she was making her projects, so I decided to make her a yarn box to store everything in. Plus, her first initial (which is on the side of the box) offers great hooks to string different colours out of the box.
This is a very simple project. It's a great gift, but also a good starter project for someone just getting into making things.
This is a very simple project. It's a great gift, but also a good starter project for someone just getting into making things.
|
Materials
- 1 - 1x10 x 6' pine board - About 20 1 1/2 wood screws - Wood Conditioner - Stain (depending on what colour you want or if you want to create a two tone stain like I did) - 80 Grit and 220 Grit sandpaper - Wood Putty - Hinges |
Other Materials/Tools
- Saw - (any kind of saw will do, but a Skill Saw or Mitre Saw will make your life a lot easier) - Jig Saw (this is a must if you plan on cutting the initial into the end pieces) - Sander - (Hand sanding is possible but a lot of work. Take $40 and invest in a little electric sander) - Drill - Drill bit that will put a hole in the board to get your Jig Saw started - Krig Jig Pocket Hole driller - Putty knife - Stencil (again, if you plan on putting the initial on the end pieces) - Sponge brushes |
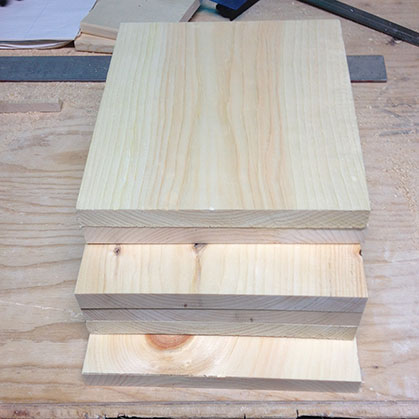
Cut list
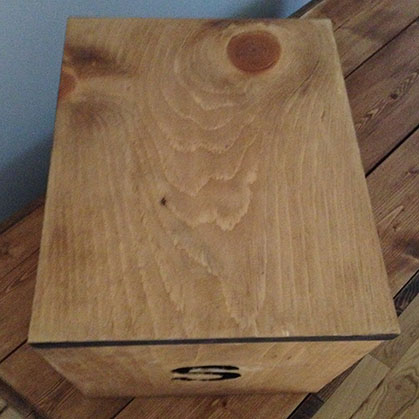
- 3 pieces at 12" long (2 for sides, one for bottom) - 2 pieces at 10" (end pieces) - 1 piece at 13 1/2" (Top) |
Now that we have the pieces cut, lets head back into the laundry room work shop.
*Note - keep in mind that your piece of 1x10 is actually around 3/4" x 91/4". Thus the odd cut lengths. Also, pine shelving that most lumber yards/home repair stores sell will do just fine. Measure your board to make sure you know the actual dimensions and adjust my cut list accordingly.
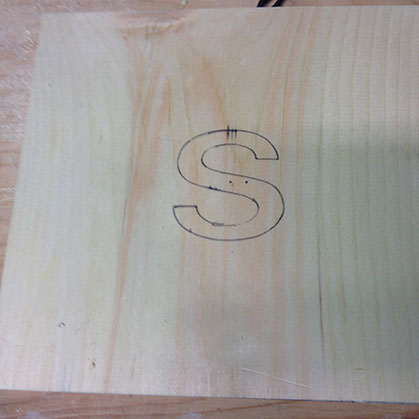
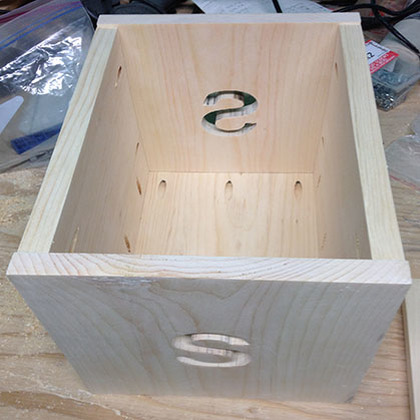
First step, draw your stencil on to the two end pieces. The "S" you see in the photo is a 3" stencil. Centre it on your board and draw your lines.
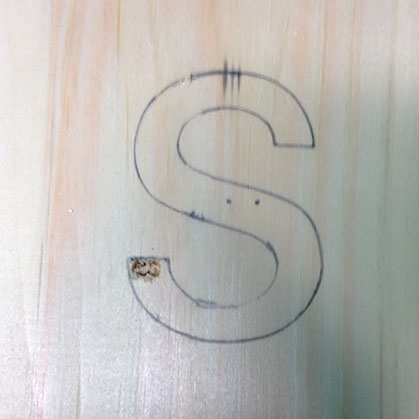
Next, use your drill to auger out two holes in the corner of your stencil. This gives you a way to get your jig saw started to cut out the letter.
|
|
|
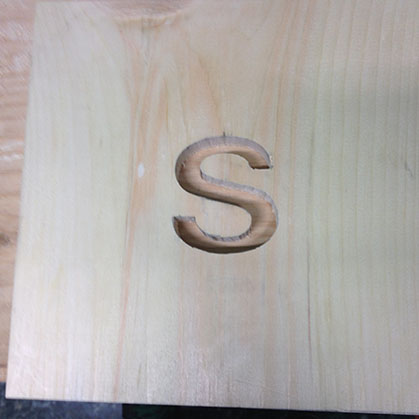
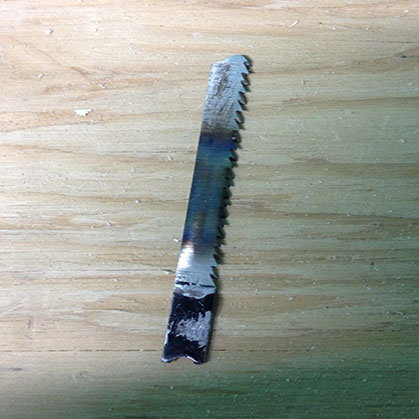
*Note of caution: I initially tried to use a very coarse jigsaw blade to cut out my letters. Then I saw a lot of smoke and realized it was burning the blade and the wood. Use a very fine toothed jigsaw blade to cut out the letters. It should cut through relatively easy and it is easier to make fine turns. And this way you won't burn a blade like I did.
|
|
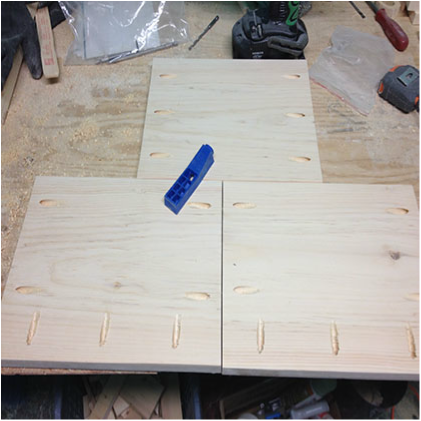
Once you have both of the letters cut out of your end pieces, it's time to drill your pocket holes. Pocket holes are a very clean way to attach the pieces. You can drill your side and end pieces in the pattern much like I did in the picture.
If you are wondering what a Krig Jig Pocket Hole Driller is, the blue object in the middle is a small version of what you are looking for.
If you are wondering what a Krig Jig Pocket Hole Driller is, the blue object in the middle is a small version of what you are looking for.
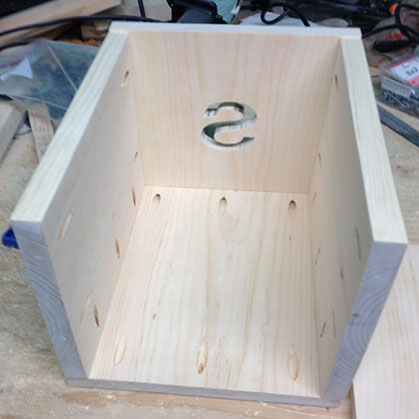
One you have your pocket holes drilled, time to attach your sides. Make sure your side pieces sit on top of your base piece, or your lid will not be big enough. Same goes for your lettered end pieces, make sure they butt up against the ends of your base. Attach pieces through your pocket holes.
Once you assemble your box, you're ready to do your finishes. Putty your pocket holes to cover them and let dry. Then you are ready to sand. I always use a 80 grit sand paper followed by a 220 grit. The 80 grit takes off any of the rough pieces (like from the wood putty), then your 220 grit gives it a very smooth finish. Once you finish sanding, wipe clean then use a sponge brush to apply your wood conditioner. The conditioner provides a little bit of protection for the wood, but more importantly, as pine is very porous, the conditioner will help you to get a more even coverage with your stain and avoid blotches. I like using it too because it really seems to make the grain in the wood pop.
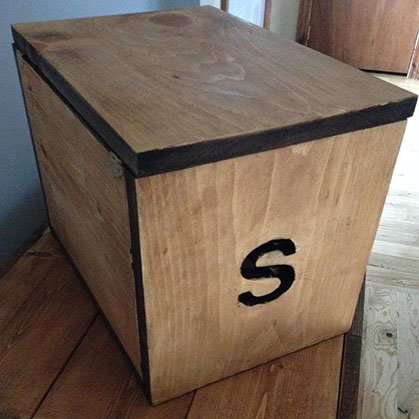
Once your conditioner is dry, apply your stain. I will usually paint the entire piece first with stain, then wipe off the excess with a paper towel. Use long strokes when wiping it to avoid pooling and blotches, along with uneven coverage. Once dry, attach your hinges and you are done.
As always, the best advice for working on or learning to do any project is have patience and have fun.
As always, the best advice for working on or learning to do any project is have patience and have fun.